Grid font can be customized from the font functions grouped under the Format All section of the Component ribbon (red highlight below). These functions can also be used as part of the extended grid formatting to apply contextual formatting to selected items in the grid. This article will focus on applying these functions to the entire grid.
Change Grid Font
Grid font can be changed from both the Formatting panel and the Component ribbon.
Formatting Panel
From the Formatting panel, go to the Labels tab of the Matrix Grid view:
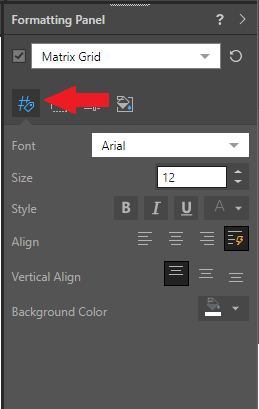
The grid font functions, from top to bottom on the Formatting panel, are as follows:
- Font: To use a different font style, click the arrow next to the default font and choose your desired font.
- Increase and Decrease Font size: To incrementally increase or decrease the font size, click the Increase or Decrease font buttons. Otherwise, type the font size you want into the text box.
- Style: Use the Style options to make the text or numbers Bold, Italic, or to add an Underline.
- Font Color:To change the font color, click Font Color (letter 'A' with a colored underscore) and select your required color.
- Horizontal Alignment: To position the text horizontally, click the left, center, or right button. The text is aligned according to your selection. Alternatively, use auto align (lightning) to let Pyramid set the alignment.
- Vertical Alignment: (Matrix Grids only.) To position the text vertically, click the top, middle, or bottom button. The text is aligned according to your selection.
- Background Color: To change the background color, click Background Color and select your color using the color picker.
Component Ribbon: Grid Font Functions
Most of these options are also available directly from the Component ribbon (green highlight below):

Font Formatting
The grid font functions, from left to right on the component ribbon, are as follows:
- Font type: Choose your desired font from the font type dropdown list.
- Font size: Increase or decrease the Font Size using the font size dropdown list.
- Style: Make the text or numbers Bold, Italic, or add an Underline.
- Font Color: Click Font Color (letter 'A' with a colored underline) and select your required color using the Color Picker.
- Background Color: Click Background Color (paint pot with a colored underline) and select your color using the Color Picker.
Size Options
- Font size: Incrementally increase or decrease the font size by clicking the Increase or Decrease font buttons (options have a letter 'A' icon with an increase or decrease sign).
- Border Thickness: Incrementally increase or decrease the border width by clicking the Increase or Decrease border buttons (options have a 'Borderline' icon with an increase or decrease sign).
Other options
- Grid Borders: Specify what the lines in the grid should look like.
- Border Color: Specify the color to use for the borders using the Color Picker.
- Clear Custom Format: Clear any font formatting changes.
- Alignment: Position the text horizontally by clicking the left, center, or right button. The text is aligned according to your selection.
Example: Alignment
Here, the alignment was set to left for the first two rows, middle for the third row, and right for the remaining rows.

Example: Theme
By default, the grid font is determined by the font settings defined in the given report theme. In this example, the grid was built based on the Pyramid 2018 theme:

Example: Font Change
Here, the font type was changed from Segoe UI to Arial Narrow, the font size was increased from 12 to 14, the font was set to bold and italicized, the font color was changed to green, the background color changed to pink, and the font was aligned to the center:
